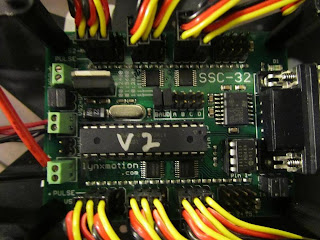
Some wiring for my PS2 cable - trying to see if its working.
Wednesday, 31 August 2011
Wednesday, 24 August 2011
New Pictures of Zeus
Ok - here is an updated picture of the total robot, its not connected between the addon deck and the main deck yet (where the white cable is plugged in, is where its not connected). This is (almost) the final product - sans camera (in this picture) and BB cannons on the side.
This is a side picture of the connections between the torso and the tilt servo, its held on by 4 screws. The servo itself is connected by two screws and a ball-bearing assembly to the bracket.
Here we have the front view of the pan and tilt assembly, where you can see the pan servo down below, a C bracket attached to it, the tilt servo attached to the C bracket and the two screws at the top are where the multipurpose bracket attaches to the torso.
Here is a front shot of the torso, head + shoulders basically.
Torso shot again, but this time with the LEDs working!
Torso shot, from down below. This shows my "neon" type effect I was going for - so the glow extends out below the robot itself.
The torso, with the lights on, and the IP camera behind it. Note, the IP camera doesnt yet have a portable power source, and I will probably come up with some way of either painting or sanding the casing down so it looks better, and more suitable to the robot.
And finally, the rear view, complete with name plate :) You can also see the kitty running around behind it.
So there we have it.
The remaining major parts of this project are:
a) Organising the IP camera to have a portable power supply, and getting it looking consistent with the rest of the robot
b) BB cannons for each arm - BB gearboxes are hard to get in NZ, but am currently negotiating with Armory NZ about it.
c) Making sure the next PS2 controller works, so the legs will actually move.
d) Finishing touches to the the look of the robot - Designing and building more plastic plates, to go with cable ties to clean up the overall robot, get all the cables out of the way and out of sight behind "armor plates". This also includes the pan and tilt assembly, so the top doesnt look so "bobblehead".
Sunday, 21 August 2011
Friday, 19 August 2011
Saturday, 13 August 2011
Friday, 12 August 2011
SSC-32, before and after pics
SSC-32 after (Baud= 38.4k and the DC-01 connector)
Thursday, 11 August 2011
Tuesday, 9 August 2011
Better Pics :)
Some better pics, including a current pic of the torso! Still WIP though, Im rethinking the curved roof-thing. It didnt scale quite as well as I thought it was going to. Masking tape is because im going to spraypaint it shortly, and the clear plastic + electronics shouldnt be painted.
Bot Board II
The robot is nearing completion! Well, the legs anyway. Struggling a little with the Bot Board II, as the PS2 controller does not seem to be connecting to it to control it remotely. See a picture, which im really just posting so that I can take advantage of my Blog's web-hosting :)
Sunday, 7 August 2011
Legs Attached!
The legs have been attached, along with the SSC-32 (servo controller board).
The next step is to connect it serially to my PC, but I have just discovered I dont have a serial port... /sigh. Anyway, will have to pick up one today or tomorrow, so progress is halted until then :)
The next step is to connect it serially to my PC, but I have just discovered I dont have a serial port... /sigh. Anyway, will have to pick up one today or tomorrow, so progress is halted until then :)
Tuesday, 2 August 2011
Leggles Complete!
One leggles down, 5 to go! I also put together the body, just to check how the legs attached. They attach fine, by the way. I am a little concerned that the servos do not appear to be perfectly straight within their little compartments, but I will have to wait and see if that becomes a problem.
A lot of fun to put together though, even if my fingers are a little fat to be putting on nuts of 0.188" - but, after dropping them a few times, I managed to get them all on there. Progress is going quicker than I had thought, but I am still pretty far away from the real hard part.
A lot of fun to put together though, even if my fingers are a little fat to be putting on nuts of 0.188" - but, after dropping them a few times, I managed to get them all on there. Progress is going quicker than I had thought, but I am still pretty far away from the real hard part.
Monday, 1 August 2011
Step One
Step One - Putting together my robot :D
I have received the main part of my robot, the legs, and I am now going through the process of cleaning up all the lexan and putting together each individual leg.
A little messy, sure, but all the parts are here and thats all that matters :D
I will update with my progress, as I make progress, and also - when I get a better camera :S
Subscribe to:
Comments (Atom)


